There are no products listed under this category.
Tune up your band saw
TUNE YOUR BANDSAW
Bandsaws can be a joy to use when they work properly. They can also be a source of frustration when they do not. A tuned saw cuts true, has no drift and works equally well with straight cuts and curves and does not require the addition of hundreds of dollars of accessories to make it work
properly. This document will allow any saw to be adjusted to produce optimum results. The individual instructions may need to be modified for an individual saw but the theory is applicable to all bandsaws regardless of manufacturer or size. The order of adjustment is designed to take a saw that may be new or just has never been tuned and make it work properly. Do not skip steps. Not everything will require adjustment but all should
be checked.
FOLLOW ALL SAFETY PRECAUTIONS. NOTHING IN THIS INSTRUCTION IS A SUBSTITUTE FOR MANUFACTURERS’ INSTRUCTIONS. USE CAUTION. TOOLS CAN CAUSE SERIOUS INJURY. USE EXTREME CAUTION WHEN HANDLING BLADES OR OPERATING THE SAW. UNPLUG THE SAW WHEN ADJUSTMENTS ARE MADE.
Do not operate the saw with guards removed. Wear safety glasses and proper safety equipment. Do not wear gloves when operating a bandsaw.
1) Blade selection. This may be the most important section of this instruction!
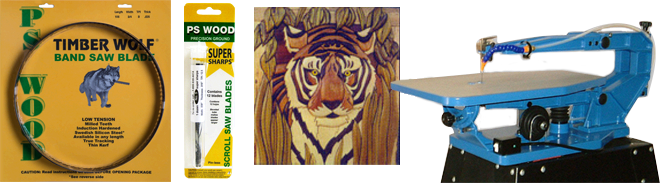
- Selection of the correct blade is critical to the optimum operation of the saw. Many people either use one blade for everything or use a blade that is too fine for the task. In general, a wide coarse blade is used for resawing and a finer narrower blade is better for thin stock. The determining factors include the thickness of material cut and the minimum radius. Using a blade that is too fine may produce smoother cuts but will cause drift when sawdust builds up in the teeth pushing the blade out of alignment. Using the wrong blade may even ruin the blade quickly by creating excessive heat and damaging the set of the teeth. Once a blade has been damaged, replacement is the only option. Match the blade to the application and when you have a choice, use a coarse blade. They will last longer and produce better results. Most saw issues can be corrected with tracking and proper blade selection.
- A ½” wide - 3TPI blade is acceptable for almost all resaw work. (in kiln dried wood) Some larger saws will support a wider blade. Wider blades give more stability but require significantly more power to operate. For general purpose cutting a ¼” wide 4 or 6 TPI blade is excellent. 1/8” wide with up to 14 TPI is used for detail scroll type sawing of thinner materials.
2) Motor drive belt
- Most band saws are belt driven via a pulley and belt. The motor is usually located in the saw base or attached to the lower housing. The drive belt should be adjusted for proper tightness and alignment with the pulley of the lower drivewheel. Use a straight edge to align the pulleys and adjust the motor position to adjust belt tension.
- Replace any belt with cracks or evidence of wear. Any belt that has sat in one position for a long time may need replacement to eliminate vibration induced by flat spots on the belt.
3) Wheel alignment. Coplanar front and back
- Remove blade and table to facilitate access to the wheels. On most saws, there are two knobs on the underside of the saw table to adjust the table angle. Remove these knobs and lift off the table.
- Use a long straight edge or level to check for proper wheel positioning. If parts of the saw block the use of a straight edge, use two blocks of wood of identical size and tape them to the straight edge where they act as “standoffs” and allow measurements to be taken.
- Wheels must be “coplanar” meaning they must rotate in the same physical plane. (Straight edge must touch top of top wheel, bottom of top wheel, top of bottom wheel and bottom of bottom wheel all at the same time.)
There are three components to coplanar adjustment.
i. Pulley positioning on the mounting shaft
ii. Top pulley tilt top to bottom (Tracking adjustment).
iii. Pulley horizontal alignment (shimmed front to back)
Place a level vertically on the lower wheel and note the bubble position on the level, checking for plumb. It is not critical that it be exactly plumb. We are getting a reference for the upper wheel. Move to the upper wheel and adjust the tracking adjustment knob on the upper wheel until the upper wheel has the same bubble position as the lower wheel. This procedure assures we are starting with wheels in the same vertical alignment. This should be close to the final position when the tracking adjustment procedure is complete as you will discover later. Usually one of the pulleys is fixed on the shaft. In many saws, such as most 14” saws, the upper pulley is not adjustable on the shaft. Any adjustment is done by moving or shimming the lower pulley on the drive shaft. Move the pulley in or out as required. Some saws require shims be installed or removed behind the drive wheel on the shaft. Shim washers are available at most well stocked hardware stores. Pulley alignment front to back should be checked on the left and right side of the wheels as you are facing them. If an error of greater than 1/16” exists, it should be fixed. In some cases the upper or lower pulley mount can be shimmed using thin shim stock. If you have a choice, shim the lower wheel to match the upper wheel position. Loosen the pulley bearing mounting bolts and add shims as necessary. Tighten all bolts and recheck. Reinstall the table and angle bolts.
4) Tires
Tires are one of the most important parts of saw maintenance. Tires connect the saw to the blade and assure smooth operation. Old tires often have flat spots or lumps and will never allow a blade to track properly. Inspect tires and when in doubt, replace them. They must be free from lumps, flat
spots, sawdust build up, cracks or loose sections. If your blade appears to jump around as it rotates, the cause is likely poor tire condition.
5) Tire replacement.
- Tires are sold based on wheel size and should be replaced in pairs. If replacement tires are wider than the wheel they should be installed with the inside edge against the back edge of the wheel and any overhang on the outside where it can be trimmed later.
- There are two types or tires.
1. Rubber tires. Rubber tires must be glued in place. Automotive door weather strip adhesive is used to attach the tires. Remove the old tire and clean the wheel with a solvent and rag being careful to follow proper safety precautions for flammable solvents. Lacquer thinner and/or acetone work well. Use gloves. Only install tires on clean wheels. Make sure all old glue and bits of tire are removed and the wheel is clean and smooth. Tires sometimes have a rough and a smooth side. Install the rough side to the inside against the metal wheel. Follow installation procedures included with replacement tires. Wait for the glue to dry properly before operating the saw.
2. Urethane tires. Urethane tires are superior to rubber tires. They last longer and hold their shape better. They are also easier to install. Urethane tires are normally not glued in place. They are under sized and must be stretched on the wheel. Typically they are heated in approx. 140°F water and then stretched on to the wheel. Use gloves. Wait a minimum of 20 minutes after installing the wheels to allow the urethane to shrink fit to the wheel.
Follow any installation procedures included with replacement tires.
- Trimming tires to width. Most replacement tires are supplied in a standard width and are frequently too wide for a specific wheel. They are easily trimmed using a razor knife and a block of wood.
- Trim a small block of wood to fit against the back edge of the saw and will support the knife in the proper position.
- Hold the knife against the block of wood and gently place against the tire while rotating the wheel by hand. Rotate the wheel several rotations and the knife will trim the tire to fit.
6) Blade installation
- Release all blade tension.
- Open the blade guides and any guide bearings both top and bottom. They must not be in contact with the blade in any way. DO NOT SKIP THIS STEP.
- Install the selected blade and adjust for minimum tension required to retain the blade on the wheel. Rotate the wheels by hand several rotations. Make sure the blade is free wheeling and does not strike any guides or guards.
- Inspect blade carefully for any imperfections such as a kink or bad weld. Any imperfection in the blade will produce poor quality cuts and may be dangerous.
- The inspection should be done with minimum tension on the blade so that kinks and any blade variation is more easily detected.
- Add a little more tension but do not turn the saw on until tracking is adjusted.
7) Tracking.
Blade tracking is the single most important factor in how a saw will perform. Virtually all wood working saw wheels are crowned and the blade must track properly on the crown, or the saw will not cut straight and will have what is commonly known as “drift.” A properly tuned saw has no drift. If your saw has drift, it is not set up correctly or you are using the wrong blade or your blade needs replacement. The proper position on the wheel is when the inside of the gullets (the notch that forms the tooth) of the blade teeth align with the center line of the wheel. The
majority of the blade will be on the backside of the wheel. Only the teeth should be forward of the wheel centerline. With very wide blades of ¾” or greater the blade can be moved forward slightly. When the upper wheel is tracking properly, inspect the blade position on the bottom wheel. When wheels are properly aligned, the blade position relative to the center line of the tire is the same on both wheels. If it is not, repeat the wheel position adjustments. When the tracking is off, the blade will twist when tension is applied and will prevent the saw from cutting straight.
8) Tension. There are low tension blades and high tension blades.
- High tension blades are the traditional blades generally made of carbon steel. These blades require more tension because the steel is less flexible when bending around the wheels. With the guides not yet set or raised up to the top, adjust tension for a maximum of ¼” blade deflection when the center of the blade is pressed with a hard steady pressure. Carbon saw blades should not be used in length less than 80” because the smaller wheel size and less flexible blade tends to lead to weld breaks.
- Low tension blades are a newer design and are made from more flexible higher silicon content steel. They do not require high blade tension and as a result do not place as much stress on the blade weld, tires or saw alignment. A low tension blade will also allow more power from the motor to be delivered to the cutting operation. Low tension blades should be adjusted in accordance with the package directions but generally until the blade just stops “fluttering” when power is turned on and the saw is set to cut maximum thickness. Note the setting on the blade tension scale for future reference. Lower tension blades are also thinner (.025”) and will work on smaller two-wheel saws as well as large saws. They are available in lengths to fit even smaller two wheel table top saws.
9) Upper blade guides. The blocks/bearings function to limit blade twisting and to maintain
proper tracking under load.
- Blade thrust bearing. The bearing behind the blade serves to support the blade and maintain proper tracking under heavy cutting load. With the upper blade guide lowered near the table, adjust the rear blade thrust bearing until the bearing just touches the blade then back it off the blade about the thickness of a piece of paper.
- Maximum height back bearing.
i. Raise the blade guide and check the position of the back support bearing relative to the blade. Not all saws have adjustable blade guide rods. Some saws have adjustable blade guide rods that can be shimmed so the vertical travel of the guide is consistent relative to the blade. If your saw has the adjustment make it right by shimming the blade guide rod mount where it meets the top saw housing. If it is not adjustable and has a significant error as is frequently the case in lower quality saws, the bearing position will need adjustment each time the blade is changed to a different height.
ii. Side bearings or cool blocks. Either bearings or guide blocks will function well in a properly tuned saw. Adjust the side blocks/bearings individually as the wheel and blade is manually rotated. The blocks/bearings should just not touch the blade (about a dollar bill’s thickness away) and the blocks/bearings front edge should be about 1/16” back from tip of teeth. The teeth must never hit the blocks/bearings.
10) Lower blade guides The lower thrust bearing serves to support the blade and maintain proper tracking under heavy cutting load.
- Lower blade guide should only be adjusted after the upper blade guide. Once set, the blade guides should need adjustment only when blades are changed.
- Adjust the lower rear blade support bearing until the bearing just touches the blade, then back it off the blade about the thickness of a piece of paper.
- Adjust the side blocks/bearings individually as the wheel and blade is manually rotated. The blocks/bearings should not touch the blade and the blocks/bearings front edge should be at the inside edge of the gullet of the blade teeth. The teeth must never hit the blocks/bearings.
11) Table alignment
- Tilt stop. Most saws have a stop that adjusts the horizontal stop of the table. Set the table square to the blade by placing a square against the blade and setting the table at 90° to the blade. Adjust the stop.
- Angle gauge. Most saws have an angle gauge which reads the angle of the table. The gauge is adjustable and is set when the saw is set to 90°. These gauges are typically not very accurate and you should use a square when accurate angles are needed.
12) Fence Alignment
Fence alignment is not critical on a well tuned bandsaw. The saw fence need not be perfectly square to the blade because the set of the teeth allows the blade to cut straight even when the fence is out of true. Get it close and it will be fine.
13) Dust Collection
Dust collection is critical to successful operation of a band saw. All band saw operations produce fine dust that can be a significant health hazard. Many species of wood are toxic when inhaled. When cutting green wood, mold and fungus spores are often found on and in the wood. Dust collection and proper breathing protection assures minimum impact to the operator. Make sure the dust collection air flow is sufficient to remove the excess dust from the area. Your saw will stay cleaner and your lungs will thank you. Maintenance of your saw. Periodically check the bearings including the thrust bearings on both the top and bottom guides. These bearings may require cleaning of pitch residue and either replacement or lubrication. Clean and lubricate the adjust screws for all guides and the tension and tracking adjustments. Check the set screws securing the wheels to the shafts and the drive pulleys to the motor and lower wheel shaft. They should be tight with no play. Tighten as needed. Inspect the cut made when using a steady medium feed rate. Poor quality cutting may be due to a dull blade or a bent tooth. Replace the blade as needed. If the saw makes a sharp metallic “tic” each time the weld goes past the guides, the weld may have a burr on it. Use a small sharpening stone gently pressed against the back side of the blade as the blade is rotated, to dress the weld and eliminate any inconsistency.
BE VERY CAREFUL TO ONLY USE A STONE ON THE BLADE WHILE ROTATING THE WHEEL BY HAND. DO NOT
TURN THE SAW ON FOR THIS OPERATION.
Inspect tires for pitch buildup.
Cutting wet or resinous woods can cause a buildup on the tires and lead to tracking issues. Clean with a stiff brush as needed. Replace the blade when cutting performance falls off or when the blade starts to “drift” even though
it is tracking correctly.